Thursday 29 August 2013

Things with Wings

Happy Thursday dear Bloggers, we've got a new challenge for you starting over on the Cute Card Thursday Blog.  Our theme this week is 'things with wings' and our prize sponsor is Digital Delights.


For my DT card this week I've continued on my quest to use the stamps in my stash that are a little neglected and haven't seen ink in a loooooong time. 

Many moons ago I purchased a sheet of stamps from Faerie Art Stamps, all of them were from the 'Mouserkins' range and I've used one of these cute stamps for my design this week.

I coloured the image using my ProMarkers and added Glossy Accents on the bubbles and the body of the tiny butterfly (although you can't see this at all in the pic - humph !).  The image is layered onto a piece of very sparkly white glitter card which I found in my stash and the background papers are from Stampin' Up!. 

The daisy embellie was diecut using a Penny Black die, which I bought recently, and a scrap of SU! cardstock.  The lace and ribbon were from my stash and the sentiment is from a set of stamps by Stampendous, which I think could be appropriate for a number of occasions.

Hope you've enjoyed today's project, do check out the fabulous work from the rest of the DT over on the CCT Blog.

I shall also be entering my card in the CraftBubble II CMLI August challenge from my crafting pal Lauren, as the theme is 'Bubbles'. 

Monday 26 August 2013

Wishi... Washi..... Birdsong

Happy Bank Holiday Monday to all you Bloggers in the UK, hope you're having a great day - the sun is shining here in my bit of Cornwall and I hope it stays long enough for us to have a BBQ later this afternoon.

The card I'm sharing with you today is my entry for this week's Simply Less is More Challenge which asks us to use Washi Tape on our designs.  I do have quite a few rolls of Washi but decided to go monochrome and use the fabby 'birds on a wire' and music notes tapes.


I created a 'sun' by spraying a short burst of Lemon Zest Dylusions Ink, holding the nozzle very close to the basecard.   I then stamped the birds in flight from a set of stamps by Visible Image over the top of the 'sun' before adding the two strips of Washi at the bottom.

That's it, simple but effective I think. 

Thanks for taking the time to visit today, hope you enjoyed today's project.

Sunday 25 August 2013

Nuffin' crafty going on but.....

Happy Sunday morning Bloggers, I have clear blue skies although windy and a tad chilly start but it is shaping up to be a very pleasant day in my part of Cornwall.

There's a bit of a craft drought going on at Stamping Grandma's at the moment, but I did have a wonderful day out last Thursday.  Visited pals who were in a caravan in Polzeath, Cornwall and the weather was gorgeous.

The evening brought a lovely sunset and I managed to capture a few great pix to share with you


I hope to have some crafty makes to share with you soon, meanwhile have a great Bank Holiday Sunday whatever you have planned.

Thursday 22 August 2013

Back to School ?

It's getting close to the 'Back to School' moment for most kids in the UK - so what a great theme for a project right now.  This week the Cute Card Thursday Challenge has the theme of 'Back to School' and our prize is sponsored by Cedar Chest Designs.

For my DT card I've used another of my older Sugar Nellie stamps - well, I got the bag of stamps out of the drawer and thought I'd use some of them before putting them away again.  I chose the 'High School Student' stamp which is perfick for this theme don'cha think ?

 
I used my ProMarkers to colour the image (I'm learning to love these pens again !) before fussy cutting it out.  The background layers were created using some of the fabby papers from the Papermania 'Happy Days' stack - which I think might be a couple of years' old now.  I also used some kraft card from a Papermania stack which a had notebook-style print.  Firstly I cut out a notebook-style page using a Marianne's die then stamped the numbers etc all over it using a Hampton Arts Graphics 45 set of stamps and Memento Tuxedo Black ink.  The tiny tab on the side was die cut using a die from the same Marianne's set and the wording was also included in this die set.
 
The sentiment was created on my computer and cut out using a set of Spellbinders dies.  I layered this up over other tags cut using the same die set and scraps of the Happy Days papers.  I added a pretty coloured staple to the stack of tags and Glossy Accents on her lunchbox and spectacles to complete the design.

That's it from me today, why not check out the fabulous work from the rest of the DT over on the CCT blog.

I've pre-scheduled this to post up on Thursday morning, fingers crossed it has published at the right time !  I'm off down in sunny Polzeath for the day and hope you have a great day in store too.

Wednesday 21 August 2013

Wednesday ? You betcha. Now what's on my Work Desk today Huh ?

Well, I'm happy to report that there ARE a number of things on my workdesk today - Yay ! 

At long last inspiration for some cards has come to me and I've been cardmaking in the last couple of days.  I'll be sharing pix of one of them tomorrow as it's my DT card for next week's Cute Card Thursday Challenge.  The bits on my desk are the makings for another DT card for the week after - I wonder if I've given the game away on what the theme is ?  Or maybe not !!  I'm such a tease aren't I ?


I've also done some more quilting and embroidery - seem to have got me a bit of an addiction to making cushions right now - oopsie !   Just think how pretty my home is going to look with all these new makes on display.

This cushion includes patchwork and hand quilting/embroidery and it is laid flat in the pic (I need to buy some more cushion pads as I've used up all the ones I had in stock !)  It was made using the very first kit I every bought and came from Cowslip Workshops (see below).  I thought I'd 'dabble' into the world of quilting so got this kit on my first visit to Cowslip.  The fabrics are so lovely that I decided to try and become more proficient before stitching the kit up.  Glad I waited as many of my 'trial and error' lessons and learning came in very useful for this project.


I made some cushions following a pattern from Jo Colwill's  - she IS Cowslip Workshops - this place is soooo worth a visit if you ever find yourself anywhere near Launceston.  If you aren't interested in fabrics/quilting, the cafĂ© is amazingly full of yummy stuff and many a happy hour can be spent wandering in the tranquil gardens or just soaking up the calm and restorative atmosphere that pervades the whole place.  Just going to the 'Loo' is an experience not to be missed ! I won't say more as it might spoil the surprise. Jo's new book 'Cushions & Quilts' is a fabulous book and contains some great pix which give you a real 'feel' for the place. 

Here's a shot of three of my cushions - modelled by my sofa


To show more detail I've photographed them individually - for anyone interested in how they were constructed

This was the first one I made


I liked the first one so much I rummaged through my fabric stash, found some
more lush fabrics and made this one


Now anyone who knows me knows that I NEVER really follow patterns (or recipes !) to the letter and just HAVE to put my own twist on things.  So for the next cushion I decided to make it bigger by increasing the size of all the pieces except the central panel.  I think it worked but if I wanted larger again, I'd increase the size of the central panel too.


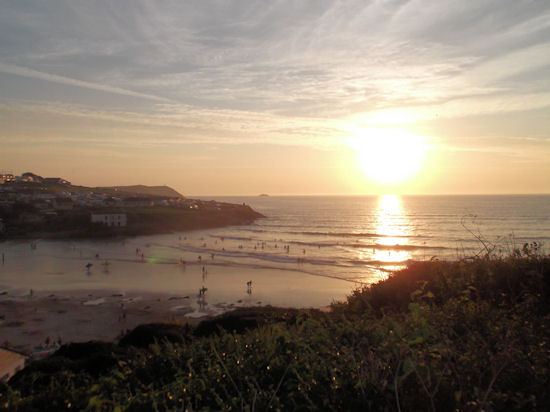
Yesterday was a glorious sunny and warm day and today seems to be shaping up much the same.  Fingers crossed the nice weather continues as tomorrow we are off to spend the day with friends who have a caravan in Polzeath, Cornwall.  It's a great surfing beach and, who knows, we might even dip a toe in the sea !  BBQ planned for the evening and it will be great to spend time with a couple who have been friends of our for around 35 years. 

If you've stuck it out to the bottom of this very l-o-n-g posting, well done and thanks for visiting.  Have a great day whatever you have planned.


Friday 16 August 2013

What's Black and White and Red all over ?

Well, my latest quilt is all of the above !  although it does have grey in it too.

As I mentioned in a previous post, I have finished another quilt and thought I'd share pix on here today.  I purchased this really lovely vibrant fabric a while ago and wasn't sure what I was going to make with it.  As the fabric is so nice I decided to cut it into larger squares and stitch them together in a very simple design.

Did it work ?  What do you think ?


Here's a close up shot of the fabrics
 
 
Modelled by my armchair !
 
 
I backed this quilt with warm and cosy red fleece and kept the quilting to a minimum to ensure it is nice and soft with maximum snugglisciousness !

Thanks for visiting today, do call back soon.

Thursday 15 August 2013

Button Up !

Good Morning dear Readers, it's Thursday again and time for a new challenge over on the Cute Card Thursday Blog.  This week's prize is sponsored by Whimsy Stamps and our theme is 'Button Up'.

As soon as I read the theme for this week, a line from a really old song kept going round in my head - "Button up your overcoat when the wind is free, take good care of yourself you belong to me......"  sung by Ruth Etting.  This is a song which used to amuse me when I was a little girl and heard it on the radio (yes, I am that old !).  If you're curious or you remember it too and fancy reminiscing, here's a link to the song on YouTube.

With this song in my head, I knew exactly which stamp I wanted to use for my DT card.

 
This is a stamp that I've had in my stash for a very long time, it's by Sugar Nellie and called 'Raven'.  I think she looks so cosy wrapped up in her warm coat, hat and scarf, perfect for a brisk walk on a chilly Autumn/Winter morning. 
 
I coloured the image using my ProMarkers - I haven't used them in a while but recently bought the Autumn/Winter Limited Edition colours and couldn't wait to use them.  I'm more a Copic fan these days as I like the brush tip, but it's good to use different tools occasionally.  After colouring I fussy cut out the image as I wanted a fairly simple design without too many layers.
 
The torn scraps of patterned paper are from a SU! set and the sentiment stamp is also from SU!  I added a button from my stash, tied with a piece of bakers' twine.  Finally, I added a tiny touch of Glossy Accents on the buttons her coat buttons.
 
It isn't too clear on the pic, but I rounded the corners on two diagonally opposite corners just to add a different dimension to the card base which has the fold at the top.
 
Hope you've enjoyed seeing today's project, thanks for visiting and do go check out the amazing work by the rest of the DT over on the CCT Blog, well worth a visit.
 
Have a great day, whatever you have planned.

Wednesday 14 August 2013

Wet Wednesday

Happy Wednesday Folks, I do hope you have better weather wherever you are than the horrid rain that's falling on my bit of Cornwall this morning.  Mind you, the rain was forecast but I always live in hope that I'll awaken to a bright sunny and warm morning.  Today it's dark, damp and quite chilly... brrrrrr !  Certainly a day to stay indoors and head to my table of craftiness I think, although I had planned to get a little work done in the garden - guess that'll have to wait until another day.

Today's project is a card I created for this week's Less is More Challenge, a one layer card to include numbers.  I was a little stuck for ideas on this one, but whilst looking through a box of ready stamped images I have in my stash, I came across this clock face* - Perfick !

*Apologies but I don't know the manufacturer of the stamp, if anyone can enlighten me, please do so as I like to acknowledge the manufacturer of any images I use in my work.

 
It is actually only one layer as I cut an aperture in the front on the base card using a Nellies Choice die and placed the clock image behind to show through the hole.  I used Distress Inks to colour the clock image before assembling and to add a little colour to the card front.  The sentiment is from a set of stamps by PaperArtsy and I stamped it using SU! Midnight Muse ink. 
 

I've also been doing a little embroidery work for a very special project.  Here's what I've done so far


I drew the angel and wrote the words freehand using a pen designed for fabrics and disappears when heated with an iron (very useful).  My writing isn't perfect but it's fine for this purpose.  I embroidered over the drawn/written images with two strands of embroidery silks, using backstitch. 

That's it for today from me, I have completed another quilt and I'll share pix of it another day. 

Thanks so much for visiting today, hope you've enjoyed today's projects.

Sunday 11 August 2013

With Love on your Anniversary

I just don't know where this weekend has gone !  Here it is already sunday evening and I'm only just getting around to posting on here.  Oh well, better late than never I guess ! 

The project I'm sharing today is a card I created to send to a couple of lovely friends who celebrated their Wedding Anniversary last week. 


I know my pal is a fan of the CAS (Clean and Simple) style of design and I also got to play with a set of Sizzix stamps and matching dies which I've had for a while but not used. 

I stamped the banner images using SU! inks, then cut them out with the matching dies before adding them to the base card, overlapping very slightly.  The scalloped heart element was created using a stamp from a set by SU! and the matching set of dies.  The sentiment is from a set of magazine freebie stamps which I've had in my stash for ages.

That's it, clean simple and classic I think.

Thanks for visiting to check out my latest project.

Thursday 8 August 2013

White on White or a Pop of Colour ?

Happy Thursday dear Blogging friends, hope you're having a great day.

I've struggled a bit to get back into my cardmaking since being away for over three weeks, but had to get myself motivated to create my DT cards for this week's Cute Card Thursday Challenge.  This week our theme is 'Die-ing to Punch' and our prize sponsor is Whiff of Joy Stamps.


My first idea for this week's card was to create a WoW (white on white) design and as I have a couple of new Memory Box dies to play with, a Christmas card was the order of the day. 

I used a lovely Christmas themed embossing folder to create an embossed background layer - sorry I don't know the manufacturer of this particular folder as there are no markings on it and I don't have the packaging any more.  I used the twig wreath die and the gorgeous candles and holly die (both Memory Box) to create two further elements for layering.  The poinsettias were cut using a set of Marianne's dies.

After finishing the WoW version, I thought I'd try adding just a Pop of colour to the design and cut the twig wreath from silver cardstock for one and black cardstock for the other to create two more cards.  To tie in the colour scheme I diecut the tiny stamens for the poinsettias to match the colour used on the wreath.  Finally adding just a few touches of Stardust Stickles - however it's very difficult to capture the sparkle of Stickles in a photograph, IRL they are sparkling away like mad !

So.....  which version do you prefer ?  I'd love to know what you think.  I do so love WoW and have to say I'm not a fan of black on Christmas cards, however, I think it works in this design.  Silver is always a classic for a festive design, so I like the silver one too. 

Check out the fabulous designs from the rest of the DT over on the CCT blog.  If you decide to enter a card for the challenge, good luck.

Thanks for visiting today, hope you enjoyed seeing today's project.

Wednesday 7 August 2013

Hello Stranger....... I hear you say !

I've been a really bad Blogger for the past few weeks, I can't believe it is almost a month since my last post on here - apologies to everyone who has dropped by here lately and found nothing new to see.  I do have a sort of valid excuse though as I've been away from home (and my stash) for just over three weeks - it's that time of year again when we take our two gorgeous grandsons away for a holiday in sunny Spain.  It was really great to spend time with them, as we don't see them that often due to their living quite a long way from here.  Could have done without both hubby and I catching some nasty germies which meant two trips to the local health centre to see a doctor and subsequent taking of antibiotics etc - pah !  Still, I'm now safely back home and working my way towards full recovery.

Having been craft starved for more than three weeks I couldn't wait to get back to my stash and table of craftiness and headed straight there the morning after arriving home.  Sat there for a while, sorted through a few things but just couldn't get inspired to create a single card, guess Mr Mojo has a real 'strop on' as he'd been left 'home alone' for so long.  I suppose he could be hiding underneath the post-vacation ironing pile, but I don't feel inclined to search in there for him !

Without inspiration for even one card, I turned my attention to my sewing machine.  Sure enough, I had some fabrics ready cut out for a project I had intended to start before I went away.  I wanted to try a new style of quilt and also have another go at freehand machine quilting - scary stuff I can tell you !   I had a pile of fat quarters in a striking vibrantly coloured chevron design which I couldn't decide what to use for.  Here's what I made with them, it's called a 'raw edge' design as the seams are exposed on the front of the quilt, rather than being hidden inside covered by the backing.  

This is the front with the raw edges


Here's the back  - as you can see these seams are smooth

You achieve this look by quilting the front square, batting/wadding and back square together with your chosen design.  Then stitching each of the squares together, clipping the seems then washing and tumble drying the quilt to make the seams fray even more - this type of quilt improves the more it's used and washed I believe.  Even after this first wash the seams are lovely and soft and fluffy.

Here's a couple of close up pix which show the freehand machine quilting details a little more clearly - I need to practice MFQ a great deal more before attempting it on a quilt made from precious and costly fabrics.  Still, this was a nice way to practice rather than just stitching on scrap fabric pieces and I do have a lovely finished quilt to use.


Sewing has got my creative juices flowing again and this morning I managed to make three cards, I'll be sharing them with you tomorrow as they are my DT cards for this week's Cute Card Thursday Challenge.

Hope you enjoyed your visit here today, I apologise again for the gap in posts on here, hopefully I'll get back to 'normal' very soon and have lots of new project to share with you.