Showing posts with label Altered Art. Show all posts

Sunday, 23 February 2014

Trying Something Different

Welcome to Stamping Grandma's little crafting corner, I hope you're having a great day.

Today I have a project to share with you which I've been working on in spare moments over the past couple of weeks or so.  It's now finally finished, so I thought I'd post some pix here on my Blog.

A couple of years ago I received a gift hamper with everything contained inside a wooden box which was made from rough wood and painted with mat black paint.  It was too good to throw away, so I have been using it to store various craft tools and materials, although it didn't look very pretty. 

Whilst clearing out my stash, I found a couple of very pretty paper napkins which inspired me to try decoupage.
 
I decided to alter the box into something pretty which I will be happy to have on display and useful in my craft room.  Firstly I applied a couple of coats of cream acrylic paint to cover up the black paint already on the box.


After the cream paint was dry, I used fine sandpaper to distress the top edges and corners, rubbing off the cream paint to reveal the black a little on edges where natural wear and tear would be typical.  I glued on a piece of green baise (which I'd also found in my stash clearout) to the base, this will prevent the box scratching any surface I place it on.


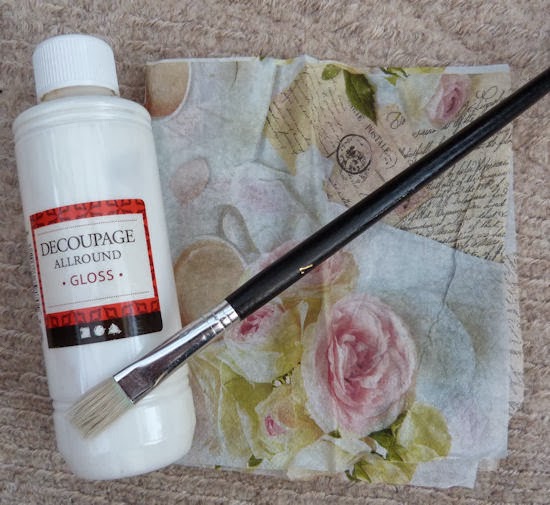
I applied pieces of the paper napkin, using decopage glue/glaze applied with a brush to cover the outside of box.

 
On the inside I added a small amount of decoration, firstly using a stencil and Treasure Gold paste to create a design in the centre.  I also brushed more of the Treasure Gold randomly over parts of the inside. 


Once the stencilled design was dry, I used Walnut Stain Distress Ink applied by brush to add further aging/distressing to the inside - particularly in the corners and around the top edges of the box where I'd previously distressed using sand paper, and across the grain to emphasise it.


The final stage was to spray the box all over with Crafters' Companion Spray and Shine - a light varnish.  Using two coats to seal and protect all the decoration, but still allow natural distressing to take place through usage.

 
I can't wait to finish the reorganisation of my craft room and put my newly upcycled pretty box on display.
 
Hope you've enjoyed your visit today, a different type of craft for me, and one I really enjoyed - you may see other decopaged projects from me in the future, now I've got the bug !  My eye is wandering over the house to see if there are any other items I can decorate - watch this space.......
 
Thanks for taking the time to drop by here today, I hope you find time for some crafting !

Sunday, 24 November 2013

Finished 12 Days of Christmas Project

Happy Sunday Folks, hope you're enjoying a fabulous weekend. 

If you have been reading my posts over the past few days, you'll know that I spent a wonderful weekend with crafting pals, which included a Workshop at Snazzy's in Swindon.  In the Workshop we were creating a '12 Days of Christmas' house.  I did share pix earlier of the progress on my house by the end of the day - not quite completed.  Since getting home I've finished it off and, as promised, here's some pix of the finished project.

The whole house
 
Top

 
Middle Floor

 
Bottom floor

 
Middle left

 
Middle Right

 
Middle Left Lower

 
Middle Bottom Box

 
Bottom Right Box


I continued using the stickers and card we received in the kit, plus some of the shrink plastic 12 days stamped images I made at Snazzy's.  The lace at the bottom was from my stash and I raided my DH's model train 'bits and bobs' box and snaffled a tree that was just the perfect size to fit into one of the boxes.  To go with the tree I made some tiny 'gifts' from air dry clay, a little gold pen to add 'ribbon' and then attached next to the tree.   The tiny glass bottles are filled with embossing powder and the '8 Maids a Milking' spilled milk bottle was created by dripping a little white acrylic paint inside and allowing it to settle - this was included in the kit.  I created the little poinsettias using a Nellie Snellen punch and emboss set and finished them off with a gold Waco Pearl Pen.

In case you're wondering and/or have inspected all the boxes closely to check, all 12 days are included within the items used, some days more than once ! 

I'm really pleased with my finished house and so glad I did this workshop. Do you enjoy this type of project ?  I had a great time and it's inspired me to attempt more altered art and 3D projects. 

I do hope you've enjoyed your visit to check on today's project.  Have a great day !