Wednesday, 30 April 2014

I do Love to be Beside the Seaside ..... !

I really do love to be beside the Seaside and feel myself so fortunate to live in Cornwall with beaches not too far away. 

I was lucky enough to attend yet another workshop at Scrapbook Magic in Mullion with a few friends recently.  During this workshop we decorated/altered a Configurations Box.

Here's a few pix of my project and the progress I'd made on it by end of the session.  I didn't want to hurry it just to finish by the end of the workshop and I'll be completing it at home.  I'll share more pix once it's completely finished.

 
I used papers from the Graphic 45 By the Sea range - I love this particular range of papers.  Using this sheet for the front as I figured the configurations box would mostly be displayed open and the inside page would be seen more often.  

Here's the back of the box, showing how I wrapped the front paper around over the spine and part way round the back.


Finally, here's the opened box showing the boxes I did manage to decorate and where they will fit into the configuration.


I will be doing lots of inking around the edges everywhere, adding papers to the empty boxes. embellishing the front cover and adding various items to the boxes, such as shells and other 'by the sea' items that I have in my stash or can find.

It was a fun workshop and I met lots of lovely ladies there, I'm looking forward to the next one.

Wednesday, 23 April 2014

Feathers

Hi there dear Bloggers, I hope you have a wonderful day, whatever you have planned.

The project I'm sharing with you today is the Birthday card I created recently for a pal.  I know she likes the CAS style and I wanted to use my recently acquired set of stamps and matching dies from Clearly Besotted Stamps, which were perfect for this style.


I love this sentiment and the feathers in the set of both stamps and matching dies are lovely.  I added the flocks of tiny birds using a stamp by Inkyliscious.

The background paper is by Stampin'Up! and I layered the stamped images onto a piece of Midnight Muse SU! cardstock.

A very simple but elegant design I think and I was pleased with the finished card.

I hope you've enjoyed your visit today, leave me a little comment if you have the time, I love to know what you think of my projects.  Thank you. 

Saturday, 19 April 2014

Tag-a-Long

Welcome Bloggers, I hope you are enjoying a nice Easter weekend.

A couple of weeks ago I went along to a workshop at Scrapbook Magic in Mullion where we created tags using different techniques.

For the first tag we inked up the dress form stamp then, whilst the ink was still wet, 'kiss stamped' a reverse text stamp inked with Black Soot DI, onto the top of the inked dress form stamp.  The dress form image complete with text was then stamped onto the blank tag.

I then applied colour to the edges of the tag using Distress Inks and randomly stamped the postmark images around the edges.


I used Alcohol Inks to colour all over a sheet of glassine paper, then crumpled it up a couple of times, flattened it with my hands, then dragged a DI pad over the top to emphasise the creases.  I then used Sizzix flower dies to cut out lots of petals, from which I created three blooms, fastened together with a brad in the centre of each.  From the scraps of glassine left over, I cut out two spool shapes, again using a Sizzix die.Lengths of cotton tape were then wrapped around each spool and the spools and blooms glued to the tag.

Tag 2 was created using different techniques.
 
I first sprayed the blank tag with different colours of ink, holding the spray nozzle close to the tag, blotting and drying with a heat gun before adding the next colour.  I then dry embossed the tag with an embossing folder in the Big Shot machine.  I dragged a DI pad over the top to emphasise the embossed image.
 
The butterfly shapes were cut from Grungeboard using a die, I then painted them with white Gesso.  Once the Gesso was dry, I applied DIs to colour each one, applied Versamark all over and clear embossing powder and heated it.  Once cooled I then over stamped them with a crackle image using black Archival ink. 
 
I then attached a pen nib to each as a body and glued each butterfly to the tag.
 
Finally, Tag 3
 
 
For this tag I stamped the fancy flourish image onto the blank tag with Versamark, sprinkled on clear embossing powder and heated it.  I used nice bright colours of DIs to add colour all over the tag and  once dry I rubbed a soft cloth over the flourishes to remove any DI residue and bring out the white outline more clearly.
 
I then stamped various small images randomly over the tag using black Archival ink.  The birdcage and tiny bird were cut from Grungeboard using Sizzix dies.  I then covered them with Versamark ink and gold embossing powder before heating with a heat gun.   I cut a  small scrap of mirror foil to fit behind the birdcage and glued the tiny bird onto the cage.
 
Finally, I wrapped a length of twine around a small bunch of twigs and another length of twine around the tag and glued the twig bundle over the top.
 
I apologise but I'm unable to tell you which dies and stamps were used on the tags as they were supplied by Margaret at Scrapbook Magic for us to use during the workshop and I didn't take notes, just got very inky fingers  ! 
 
Thanks for dropping by to check today's project, I hope you've enjoyed your visit.


Sunday, 13 April 2014

Many Good Things Come in Small Packages !

Hi there, I hope you've all had a great weekend, it has certainly felt as if Spring has well and truly arrived in my part of Cornwall, lots of lovely sunshine and clear skies.

As you may have guessed from my post heading, I've got a couple of small packages to show you for today's project.


I recently treated myself to the Sizzix Tim Holtz Alterations match box die and I have to say I'm really pleased I did !
 
The first matchbox I made is the one on the right using some Stampin' Up! Crumbcake cardstock.  I firstly cut out the shapes using the Sizzix die then embossed the outer cover part using an embossing folder and my Big Shot.   I then distressed it a little using Walnut Stain Distress Ink.
 
After gluing the outer cover together I added a couple of pieces of cream lace, a daisy flower which I had created using air dry clay and a silicon mould and coloured with Promarkers and Treasure Gold paste.  I also added some leaves cut using a Martha Stewart punch.  I then cut out a lacy bow and ribbon using dies designed by Sue Wilson for Creative Expressions and SU! Early Espresso cardstock. 
 
Here's a pic showing a close up of the open matchbox, I lined the box with some pretty pink paper and added a scissor charm with a piece of lace tied onto it.  I also put in a small oval plaque and a little bow which I created using the air dry clay and two silicone moulds, colouring with Distress Inks and Treasure Gold paste.  Finally, I made a handle using a scrap of lace and a brad.
 
 
I created the flower matchbox using some materials which my pal Linda had given me a very long time ago.  A group of my crafting pals and I had decided we would take it in turns to provide a set of materials to everyone else in the group and see how different everyone's projects turned out.  The materials Linda provided were a 12 x 12 sheet of kraft cardstock, some scraps of pretty papers, a couple of flowers, a length of ribbon and some buttons.

I used some of the kraft card to cut out the matchbox with the die, then covered the outside using the scraps of paper.  I wrapped the ribbon round the box two or three times and secured it under the flowers which I'd layered up.  I finally added the little buttons to finish off the design.


This is the opened matchbox showing the small organza bag of dried lavender I placed inside.  I decorated the organza bag with a small flower punched using a SU! punch and a scrap of the paper used to decorate the outside and a flower shaped gem.  Finally I added a flower shaped brad to the end of the inside box to use as a little handle. 

When you open the box, there's a lovely aroma of lavender, which I love.

Thanks for dropping by to check today's project, I hope you enjoyed your visit. 

Friday, 11 April 2014

It's a little early but..... Happy Easter !

Well, actually it's not early it's a bit late actually - my card that is!

The card I'm sharing with you today is my DT project for the Cute Card Thursday Challenge which started yesterday.  This week our theme is 'Easter' and our prize sponsor is Whiff of Joy Stamps.

I needed to get an Easter card made quickly to send to my Grandsons, my favourite method of card making is colouring images, however, I am currently having some dexterity issues and so am looking for other ways to create my cards.  I received an email from Crafting.co.uk offering me free Easter downloads, so I thought I'd use some of these for my card.  Not my usual type of card design, does it work though ? What do you think ? 


To me it feels a bit like 'cheating' to use printed designs on a card rather than stamping and colouring images myself, so I like to add and alter things around and make it more my usual style. 

I cut out and attached various elements from the free downloads and added a few embellishments.  On the 'egg bunny' I added buttons for his eyes and nose and, as I do like a bit of bling, added Platinum Stickles around the edges of the layers.  The sentiment was attached using foam pads to lift it away from the background a little.

I am quite pleased with the finished card and at least it's ready to post in time to arrive with my Grandsons before Good Friday.

Do pop over to the CCT Challenge Blog to check out the amazing creations from the rest of the Design Team, it's well worth it I can tell you !

Thanks for dropping by here today, I hope you've enjoyed your visit.

Sunday, 6 April 2014

Spring Colours

Hi Folks, it's been a while since I last posted anything on my blog, I have been crafting a little but just not had an opportunity to share any projects with you.

So, today I thought it was about time to post up something new.  Today's project was inspired by this month's Lavinia Stamps Challenge, which has the theme 'Spring Colours with the stipulation that only Lavinia stamps be used.

When I think of Spring colours I imagine yellows and greens, with just a hint of pinks and mauves as various wildflowers begin to bloom, so I have used these colours on my entry for this month' challenge.

 
I created the background using Distress Inks and overstamped various Lavinia images using black Archival ink.  I used a water brush to lift out a little of the colour in front of the Fairy Houses, among the trees and on parts of the stone path to create the impression of light and contours.  I also used the same water brush technique to create a horizon.

As a finishing touch I scattered Shabby White Frantage Emboss Enamel over the image and heated from underneath to melt it.

I'm enjoying playing with Distress Inks at the moment and having great fun !

Thanks so much for dropping by to check out today's project, hope you enjoyed your visit.

Saturday, 29 March 2014

Floral Delights !

Happy Saturday dear Readers, hope you are having a great weekend.

I'm a couple of days late sharing this project with you - it's a small batch of cards I created as my DT project for this week's Cute Card Thursday Challenge, which started last Thursday.  The challenge theme this week is 'Floral Delights' and our prize sponsor is Bugaboo Stamps.


I used Distress Stains in Faded Jeans, Antique Linen and Fired Brick and the 'splat' technique - using the tip on the DS to 'smash' the bottle onto the cardstock with enough force to create a splattering of colour.  

Using a set of circle Nesties I diecut a circle from white card and a slightly larger circle from red card.  I then stamped onto the white circle using a stamp from the SU! 'Flower Shop' set and Tuxedo Black Memento Ink.  I then added DS splats randomly over the circle.

I cut the white circle down the centre vertically and made horizontal cuts off-centre on each side to create an asymmetrical shape.  These pieces were then attached to the red circle, leaving a space between each piece to allow the red to show through.

Finally, I stamped another flower from the same stamp set using SU! Midnight Muse ink and scrap of white card, cut out the flower shape using the matching SU! punch and attached in the centre.  I then stamped the circular sentiment image using a stamp from a Hero Arts set and SU! Cherry Cobbler ink and punched out with a small scallop punch, again from SU!.  I attached this to the centre of the flower.

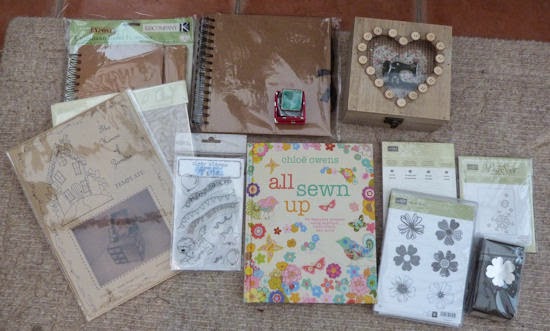
These card were created as Thank You cards as I needed a number of them to send to my lovely family and pals who spoiled me with so many fabulous Birthday gifts earlier this month.  Here are a couple of pics of my gifts - thank you all so much ! 


The 'eagle-eyed' amongst you will have spotted the Flower Shop stamp set and matching punch I used on today's cards.

Thanks for dropping by today, hope you enjoyed your visit.

Tuesday, 25 March 2014

Three Little Pigs

I have a real fun card to share with you today, how can you help but smile when you see these cute little piggies ?


I'm afraid I don't know the manufacturer of the stamp as I found this image in my box of stamped images waiting to be coloured and used in a project.  I wondered if it might be a Penny Black stamp, but so far I haven't been able to track it down.  If anyone recognises the image, please let me know the manufacturer and name of stamp an I'll update this post.

I coloured the three little piggies using my Promarkers, then layered the image on dark blue card.  I created the background layer using Distress Inks applied using a stencil brush through a Memory Box stencil.  This technique gave me a lovely subtle effect, perfect for a background layer.

The fabby Happy Birthday bunting was stamped from the 'Streamers' set of stamps by Shaggy Dog Tails, which my lovely pal Jacqueline gave me as a birthday gift recently.  I coloured the letters with Promarkers then added Stardust Stickles to make it a bit 'blingy'.  I added Gold Stickles on the bobble hat and Glossy Accents on all of the hats to give them dimension.

As the coloured image is quite 'busy' and I made the card for my youngest grandson who was 10 years old recently, I decided to keep all the other elements and layers very clean and simple.

My grandson was delighted with his card as it make him laugh and he particularly liked the piggy in the middle !
 
Thanks for dropping by to see today's project, I do hope you enjoyed your visit.

Sunday, 23 March 2014

... of Crafting, Clocks and Cake !

I can't believe how much time has passed since I last posted on my Blog, so much has happened and I have lots to tell you.

Firstly, I had a great weekend with my crafting pals a our 'Craftathon 2014' this year.   We are a group of crafters who met online through the Craftbubble Forum, which is sadly not in existence now, but we all still keep in touch regularly and we try to meet up a couple of times a year.  My pal Kathy has written an excellent description of Craftathon on her blog here if you'd like to learn more.

I thought I'd share a few pix of the weekend activities to give you a taste of all the fun we had.  Our main project for the weekend was to decorate/alter a Tando Creative clock blank.  In addition to this, we all put together a 'shoe box' project where we made an item and then put together a set of the materials we used so that everyone else could replicate our design or use the materials in their own way to create a unique design.  This gave us six projects to work on over the weekend in addition to the clock.

Here's my finished clock

 
I covered the blank with black gesso first
 
 
Then I used a sheet of Graphic 45 Steam Punk Spells 12 x 12 paper and a few stickers from a sheet in the same range plus the Steam Punk Spells 1 set of stamps to decorate the clock.  I haven't decided yet whether I'll add the pendulums to the bottom, they are gessoed ready but I'm still thinking on it.


Here's how everyone else finished their clocks - I love how they are all so different


My shoebox project was this altered chipboard shape

 
I stamped the Create, Inspire, Dream stamps onto canvas heart shapes using Versacraft ink then ironed to make the ink permanent.  I made the rose embellishments using silicon moulds and air dry clay, then coloured them using Distress Inks and a light brushing of Treasure Gold guilding paste.  The background is papers from the DoCrafts Madame Peyraut range, the main sentiment is an Inkyliscious stamp and the shaped layers cut with a set of nesties.  All layers distress with Distress Inks and Treasure Gold.
 
Here's what everyone made with their pack of materials


Here we are, stash unpacked and all settling down to work on the first day


Lauren's shoebox project was this cute birdhouse made using a Sizzix die - this is how everyone's turned out, so pretty aren't they
 

Cherry challenged us with a journal page for her shoebox project
 
 
 here are the three which were finished by the end of the weekend, such creative work from the Craftashoniers


My Dad's shoebox project was a clock made using an old CD/DVD with a selection of designs to choose from, these three were finished by the end of the weekend.


Deb set us the task of creating a pretty door hanger, here's her original - front


and back - so pretty in pink !


and our interpretations of Debs' design


Sadly I don't seem to have a pic of Kathy's shoebox tag book project which was splendid, but here are the ones finished by a couple of the Craftathoniers


Nicola's shoebox project was to create a decorative tag using a number of techniques, to produce a lovely finished tag like her original (here she shows each of the stages)


My Niece joined us for the first day and here's her beautiful finished clock - well done Becky


And here's my Dad's fabulous finished clock
 
 
And now to Cake !
 
Nicola spoiled us all by bringing along her delicious homemade cake which was greatly enjoyed by all over the weekend - slurp....


We all went out for dinner on the first evening at a local pub/restaurant


at the end of the meal, they surprised me with a delicious birthday cake, complete with candles !  It was my birthday a few days later and I received some fabulous handmade cards and great gifts,  I was thoroughly spoiled - thanks everyone


Eventually the weekend came to a close, here we all are in our last group pic 


We all agreed that this year's format with a main project plus the individual 'shoebox' projects work really well and we are likely to repeat it at next year's get together at Craftathn 2015.  We were able to take away with us the packs of materials for the shoebox projects we didn't manage to finish over the weekend so we could complete them once back home.
 
This was a rather picture intensive post, thanks if you've stuck it though to the end and checked out some of the things I got up to since my last post.
 
I have a few more to share with you over the coming days, I hope you've enjoyed today's posting.

Wednesday, 26 February 2014

Mail Art

Recently I joined a Mail Art Swap with some lovely online crafting pals.  I thought I'd share the ones I made with you today as I'm pretty sure all of them will have been delivered by now.

I decided on a different colour for each of the envelopes, selecting the colour I thought each of my pals would like.

Here's a pic of the fronts of the envelopes


I used Distress Inks to colour white envelopes, selecting a light, medium and dark from each colour family.  Using a number of different stamps from Kaisercraft, Visible Image and Inkyliscious and the darkest DI in each colour family, I overstamped randomly on front and back of the envelopes.   The feather image and sentiment were stamped using black Archival Ink.

Here's a view of the backs


All of the designs were similar, but not exactly the same on each envelope. 

I masked an area on the front whilst adding the DI's to ensure the address would be easy to read.

Finally, I sprayed two coats of Crafters' Companion Spray and Shine over both front and back to seal the inks and give the envelopes a little more 'body'.  DI's are water-based and if not sealed the colour lifts off with water so, bearing in mind our recent weather, I didn't want my Mail Art to arrive at it's destination as plain white envelopes with all the colour washed off ! 

I hope my pals liked their Mail Art and that I selected the right colour for each of them. 

Thanks for dropping by to check out today's project, hope you enjoyed your visit.