Sunday, 31 January 2010

Introducing the amazing Miss Abby!

Welcome to the show!!  Today I am introducing the brand new, just released - drum roll please!...... Miss 'Abby the Mermaid'.  Abby is the latest of the beauties, designed by Maigan Lynn, to be released by Queen Kat Designs and will be available in the QKD Store from Wednesday 3 February. 

I hope you are enjoying today's Monday Blog Hop and you should have arrived here from our new DT member Kimme's blog if you didn't you might like to start at the beginning of the Hop by going back to the QKD Blog.  After all, you wouldn't want to miss a single one of the inspirational projects created by the DT especially for today's Hop, now would you? 

Our challenge for this week is to work with the sketch on the right, I am always amazed at the different interpretations of the same sketch when I see the work by the rest of the DT.  I had to give some thought as to how I was going to follow a sketch with round elements, when the Abby image is so long and thin!  However, I decided to turn the sketch on it's side and move some of the elements around, but I think it works!

I adore the simplicity of Abby, I do love intricate stamps, but sometimes, you know, it is nice to have more or less just the central character to colour and Abby certainly stands alone in all her amazing beauty.  To me, she invokes a dreamy, imaginative mood.... sweet innocence and honesty. 

I selected these lovely papers in muted shades of aqua, pink and mauve as I felt they were perfect for the dreamy effect I wanted to create.  These colours speak to me of Amethyst and Rose Quartz crystals, two of my favourite crystals to have near me, especially when I am in a creative mood.  The papers are magazine freebies and the aqua paper is in fact from a Christmas selection - just goes to show that Christmas papers aren't just for Christmas !   The design is supposed to represent snow, but I think it looks like water too.

I coloured Abby with Copics and ProMarkers, adding touches of Spica glitter pen on some parts of the image.  I also took the liberty of using just her tail from the whole stamp to create some round embellishments, rather than adding flowers or buttons (I hope she'll forgivie me!!). 

The lacy hearts panel was cut using a Martha Stewart border punch and I used the tiny hearts that are punched out from the border to scatter around the main image to tie everything together.  The sentiment is from a set by QKD and I selected the word 'imagine' to stamp along the length of the strip.  Again, I think this sentiment really suits the mood of the image and the colours and, as it isn't a specific message, this card would be suitable for many occasions.  Finally, I added a little Glossy Accents on each of the bubbles to give them a 'watery' feel and three of the clear gems from my stash - I love these as I think they look just like droplets of water.

I am now sending you off to see the fabulous creation that Steph has to share with you today, thank you for joining in with today's Hop, I hope you're having fun and finding inspiration along the way, don't forget to join us again next Monday when we will be showcasing yet more newly released stamps from QKD.  There is also the Tuesday Hop taking place tomorrow, when the rest of the DT will be unveiling their creations using more of the newly released stamps.  I know they'd love to have you join in tomorrow, the Hop starts as usual on the QKD Blog.

I love to get feedback so if you'd care to leave a comment before you hop along to the next blog, I'd be so happy.
hugs
wynneth
x

Bunnies in Love

I've got a sweet and simple card to share with you today.  This cute little image is a Lili of the Valley stamp and I think it is just so sweet.  This card would work for a non-traditional colour Valentine's card I think, or a birthday, "sorry", get well or "just sending love" card, depending on the wording inside.

I coloured the image with ProMarkers and added clear Spica glitter pen to the bunny tail on the left.  The pretty paper is from the Papermania 'Spring Time' 8x8 paper pack.  I created a green layer to match the paper for under the image layer, by colouring with a Pear Green ProMarker around the edge of a piece of white cardstock.

The flowers are from a mixed pack of flat flowers from Wild Orchid Crafts and the leaf fronds were cut with a Martha Stewart punch.  The sentiment is from a new set by The Greetings Farm which I stamped with olive chalk ink and cut out using a circular punch.  As the layers and flowers are fairly flat, this card will fit easily into an envelope for mailing.

I hope you've enjoyed viewing my card today, and that you'll return here tomorrow when I shall be showcasing a brand new stamp from Queen Kat Designs, as part of the QKD Design Team Monday Blog Hop.  I do hope you'll join in with the hop this week, we'd love to have you along for the ride!
hugs
wynneth
x

Saturday, 30 January 2010

Something Completely Different


For many years I used to work with ceramics, both 'throwing' pots using a wheel and also sculpting.  One of the techniques I loved included using a Raku kiln.  The clay pot is thrown in the usual way and glazes applied to it before placing in the kiln.  A Raku kiln reaches much higher temperatures much faster than a regular kiln and the (often) unpredictable and delightful effects on the finished items are created by removing them while still glowing hot.  They are then placed it into a box of wood shavings and sawdust - other materials are sometimes added such as plant matter and even manure!! - and left to cool a little.  The sudden changes in temperature cause cracking in the glaze, and the smoke from the burning sawdust blackens the item which highlights the cracks.  The picture above is of a set of three pots I glazed and Raku fired.  I was very pleased with the finish, both colour and texture.
The next picture shows two items, thrown in the usual way on a wheel then glazes added which contain various crystals.  The crystals melt during the firing process in the kiln and create random natural patterns on the surface of the item.  The smaller pot is a nightlight holder - the holes were carved into the clay after it had dried a little and before firing - and the larger one I use to hold pot pourri.

I know I usually share my cardmaking projects with you, but I felt like a change today, I hope you've enjoyed your visit.  I will be showing you a card tomorrow and hope you'll return to allow me to share it with you.
hugswynnethx

Friday, 29 January 2010

A bit of a giggle!

I'm sharing a really fun project with you today!  The Creative Stitches and Hobbycraft Show is happening at the Exeter Westpoint Arena this weekend.  I am off there today with a couple of my crafting buddies for a fun day out.  Even more excitingly, I am meeting up with on-line crafting pals who don't live close enough to me for us to have regular get togethers.

To ensure that we will recognise each other in the busy crafting crush that is always at the show, we decided to make badges to wear so that we will be able to spot each other more easily. 

To create my badge I used my Wizard Kaleidescope Pendant Shapabilities die set, cutting the base layer and the layer under the letter from glossy pink card.  As my name is quite long, I decided to only put my initial on the front.  I found the round silver and white inverted scallop layers in my box of bits and added these to the front.  I cut a second base layer in white card then inserted a length of pink ribbon between the two base layers before sticking them together, creating a hanging loop.  I took a white finish chipboard letter W from my stash and coloured it with pink Spica glitter pen.  I then glued this to the front of the badge, covered it with Glossy Accents and dusted Glamour Dust while the GA was still wet.

I think that my pals may well recognise me when I am wearing this!!  Although I don't have a long shopping list, I will no doubt stagger home with a few bags of goodies that have taken my eye at the show!  I hope today's project has brought a smile to your lips!

UPDATE:

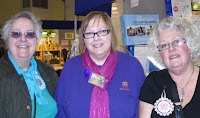
Quick update for you, as you can see the badges worked!!  All the 'Bubblers' at the show  found each other and we got this chance for a photoshoot!  A great time was had by all and far too much money was spent - a really successful day then!!!
hugs
wynneth
x

Thursday, 28 January 2010

Mother and Child Embrace


I just adore this sweet stamp from Whiff Joy  - 'Willow with Toddler'.  You can just feel the love between this mother and her child in the image.

I coloured the image with Copics and ProMarkers with just a little clear Spica glitter pen added to the flower in her hair.  The BP is a magazine freebie and has really subtle colours in the design.  The flowers and silver coloured brads are from my stash.  I wrapped white organza ribbon a few times around the card tying it in a bow and securing two small silver coloured charms.  The Teddy charm is double sided, so it doesn't matter if it twists around, the heart has the word LOVE embossed on it.

A really simple layout which would work for a new baby card for either a girl or a boy.

Thanks for visiting today, I hope you enjoyed viewing my creation and that you'll be back again to see more of my work in the future.

hugs
wynneth
x

Tuesday, 26 January 2010

WIS Wednesday

Thank you for visiting my blog today, I have my regular Wednesday slot over on the Whimsical Ink Sorority Blog and today I have created a card for you using the January WIS Kit from Queen Kat Designs.  I hope you'll hop over to the WIS Blog to take a look and it would be great to get some feedback, so if you'd care to leave me a comment either here or on the WIS Blog, I'd be so happy. 

Do come back tomorrow, when I will have another creation to share with you.

hugs
wynneth
x

Hello Sweet Bear


A new challenge blog called Just Cute Bears has recently started up, running a weekly challenge. 

For their first challenge we are asked to create a project with the theme 'One for the Girls' and the only requirement is to have a bear image on it.  There is a prize on offer, kindly sponsored by Cuddly Buddly Crafts.  Entries need to be in by 10pm UK time on saturday evening.

Here is my entry for the challenge, I used this lovely Popcorn Bear stamp, which I coloured with ProMarkers.  The BP is from the pad of My Minds Eye papers which came free with the February issue of Cardmaking and Papercraft magazine.  I created the lacy edge to the two paper layers with a Martha Stewart punch.

The round lacy layer behind the bear was cut using a Wizard Kaleidescope Pendant Shapabilities die, cut from pink pearl card which I had in my stash.  The sentiment is from a new set by The Greetings Farm which I bought recently.

I hope you've enjoyed viewing my card today and that you'll visit my blog again soon.  Tomorrow I will be sharing with you a creation using a stamp by Queen Kat Designs which will be posted on the Whimsical Ink Sorority blog.

hugs
wynneth
x

Sunday, 24 January 2010

Who Might Live in a House Like This?


Welcome to today's Queen Kat Designs Monday Blog Hop.  You should have arrived here from Lara's blog, but just in case you didn't, here's the link to the QKD blog where it all starts, why not hop over there now and start from the beginning, that way you won't miss any of the inspirational creations from the DT.

This cosy looking room is our inspirational picture to work with for today's projects.  Before I show you my creation, I thought I'd give you a little background as to how my thought processes and design concept developed for this particular project!  I just know that I would love this home, the colour scheme is definitely my 'style' and so restful.  That welcoming fire burning away in the centre pillar makes you just want to curl up in the fireside chair and get 'stuck in' to a really good book.  My own first impression of the scene took my imagination towards a 'real old-fashioned style' family home, one with portraits of family members proudly on display and so - my design concept was born! 

For my project I've used the amazing  'Awaiting the Moment' which was released this month and is available in the QKD Store.  To me, this stamp epitomises the whole 'Family' concept with it's expectant Mom theme.  I also wanted to demonstrate that it isn't necessary to use the whole stamp when designing your work, and that by using parts of a large stamp in a different way it can give a whole new perspective to the original image. 

I used parts of the stamped image to create some 'portraits' of the main characters.  The BPs I used reminded me of  wallpaper and so are perfect for creating the 'room effect' I was aiming for.  I created a frame for each of the 'portraits' with a set of deckle edge nestabilities dies and some mottled moss-effect glossy green card. 


The images were coloured using Copics and ProMarkers, with small touches of Spica glitter pen added.   I took a square 6x6 base card and folded each half of the card in the centre, creating 4 panels or 'walls' on which to hang the portraits. 

I wanted to add home furnishing type embellishments and added cream lace, with antiqued bronze effect large brads to hold the lace on each panel.  These gorgeous brads remind me of lovely antique door knobs and have been sitting in my stash for some time! I attached a few words, stamped using a set of QKD sentiments, which I felt fitted with my 'family home' theme.  I created the flowers from Grungepaper, coloured with Distress Inks and brushed over with stickles. 

Finally, I created the 'Home is where the Heart is' sentiment on my computer, printed it in brown ink on to white card and distressed the edges with brown Memento ink.  I then placed the final frame around it and placed it on the last 'wall'. 

I do hope that you've enjoyed viewing my project today, and that you are enjoying todays blog hop.  I'm now going to send you on your way to Steph's blog to see the amazing project she has created for you to share today.  Don't forget that the rest of the DT have projects to share with you on tomorrow's Tuesday Hop which again starts on the QKD Blog

Not forgetting that the 20% off everything Sale ends on 31 January over in the QKD Store.  It's a great time to build up your stash of stamps, papers, kits, etc while the prices are discounted and if you order between now and 31 January, a free stamp will be added to your order - why not go check out the details in the Store.

I hope you'll join us again next Monday for our weekly Blog Hop - it's the first of the month and we have the February new release stamps to share with you - you won't want to miss them, they're amazing !
hugs
wynneth
x

Sealed with a Kiss


For today's card I've used  this sweet Sugar Nellie stamp and a colour combo of red and pink. 

I coloured the image with ProMarkers and cut it out with a round nestabilities die and matted this layer on to red card cut with a petite scallop circle die.  I created the lacy heart circle using swirls punched out with an EK Success punch.  I used two swirls for each heart, joining them to create a circle and a further pair for the top left embelishment.  I took some red heart shaped brads, cut the 'legs' off and added them to the top of each loop to emphasise the heart shape.

The BPs are magazine freebie papers and the little sentiment was also part of the freebie.  I cut out a tag with a nestabilities die, fastened the sentiment to the front and attached to the card with a length of red organza ribbon.  Finally I punched out some small flowers from a scrap of the red card and added stickles at the centre of each flower.

The layout is based on the sketch for this week's Let's Get Stamping challenge over on Craftbubble so I can enter it for that challenge.  This week's challenge on Quixotic Paperie asks us to use an 'old' stamp or one which we haven't inked up for some time.  So, this card is perfect for this challenge also - I am always happy if I can make a creation fit into more than one challenge and I think I managed it with this card.

Thanks for dropping by, hope you are enjoying your Sunday.  Don't forget that tomorrow is Queen Kat Designs Blog Hop Monday and I have an exciting project to share with you as part of the Hop.  I do hope you'll come back tomorrow and take part in the Hop this week.

hugs
wynneth
x

Wednesday, 20 January 2010

Feelin' Peachy!


I recently found the Sweet Stampin Challenge Blog where their weekly challenges can include sketches, colour and subject themes.  There are prizes to be won too, so well worth entering a project.  My crafting pal Jayne introduced me to this blog, thank you so much Jayne!  She is a member of the blog Design Team and her work is amazing and it's well worth a visit to her own blog to check out her creations.

This week's challenge theme is "Feeling Fruity" which can be interpretted any way you wish!  I think this adorable Tilda with peaches from Magnolia stamps fits the bill perfectly for the challenge.  I coloured her with ProMarkers and cut the image layer out with a deckle edge rectangle nestabilities die.  The BPs are magazine freebies and again are pefect for the 'peachy' theme of this card. 

I cut medium and small sized flowers with nestabilities dies from scraps of the same papers then embossed them in the Swiss Dots Cuttlebug embossing folder for added texture, finally I added green Card Candy in the centre of each flower.  I created the sentiment on my PC, printed in green ink, then cut it out with deckle-edge scissors to tie in with the other elements of the card. 

The layout is based on the sketch from the 'Let's Get Stamping' challenge for this week over on Craftbubble, which also has the theme of using Spring colours - peach and minty green are perfect for this.  So I am going to enter this card for both challenges, I love it when a plan comes together!!!

Thanks for stopping by my blog and allowing me to share my creation with you.  Please call back again as I will have more creations to share with you.  It's great to get feedback and I would be so happy if you left me a comment before you leave!
hugs
wynneth
x

WIS Wednesday

It's wednesday again, time for me to point you towards the Whimsical Ink Sorority (WIS) blog where my latest creation is on display!  I decided to use 'Star Mermaid' from Queen Kat Designs as the image for today's card, click here to take a peek.

Thanks for visiting my blog today, I have a regular wednesday slot on the WIS blog, if you like what you see, why not add the WIS blog address to your favourites so you don't miss anything in the coming weeks!  I'd love to see you over there and it would be so cool if you left some feedback for me in a comment.
hugs
wynneth
x

Tuesday, 19 January 2010

Mouserkin Dreams


Today I have a little card to share with you on which I used one of the adorable Mouserkins stamps from Faerie Song Art Stamps.  I was so lucky to have won this stamp for my entry on the FSAS group challenge on Paper Craft Planet recently.  There's a new challenge every two weeks and Heather of FSAS is the very generous sponsor of a stamp of your choice as the prize for each challenge.  Well worth entering, why not have a go yourself :o)

These stamps are just so sweet and when the details of the Let's Get Stamping challenge over on Craftbubble this week included using spring colours, I immediately thought to use this sweet Mouserkin image for my entry, using the sketch provided.

The DPs are magazine freebies and I added a piece of white lacy card, punched out with one of my Martha Stewart border punches.  The image was coloured with ProMarkers and I added some Glossy Accents dusted with Glamour Dust to the star on the top right of the image to give it dimension and sparkle.  The two little pink buttons came from my stash, I cut out the image by hand and the white layer under the image was cut with a petite scallop circle nestabilities die. 

A nice unfussy sketch to work this this week and, as I didn't add a sentiment to the front, the card could be used for any occasion.

Thanks for dropping by today, I appreciate your support.  Please come visit again when I will have more creations to share with you.  I love feedback so if you'd care to leave me a comment I'd be so happy.
hugs
wynneth
x

Sunday, 17 January 2010

Monday Hop Time

It's hop, hop, hippity-hop time again today folks!! If you didn't arrive here from Lara's blog, then do hop along to the QKD blog to start at the beginning, that way you won't miss any of the DT's inspiring creations they have to present to you today.

For our projects this week, Queen Kat asked us to use the colour combo Red, Black and White. I decided to use the fabulous 'Peace of Mind' mermaid stamp (don't forget that everything in the QKD Store has 20% discount off the price from now til 31 January, so a great time to add this great stamp to your collection!).


Rather than a regular sized and shaped card for my project today, I decided to create a free standing pop-up card for a change. A relatively easy technique to create a memorable card. You can find a tutorial to follow on Split Coast Stampers click here if you'd like to have a go at creating this type of card yourself.  You will have to register with SCS in order to access the tutorials, they are all listed under the resources tab.

I coloured 'Peace of Mind Mermaid' with ProMarkers and Copics and added Spica glitter pen to her wings in red and grey, with touches of clear on various parts of the image. I used plain and petite scallop oval nestabilities dies to cut out the image, the red layer underneath the image and to create a reinforced area at the top of the tag into which I inserted an eyelet using my Cropadile. The ribbons and fibres tied to the top of the tag were from my stash.

The card folds down flat to fit into a C6 envelope for mailing - see the picture on the right which shows the card closed down.

I created the flowers from Grungepaper, coloured with Tim Holtz Distress Inks, with stickles brushed on after the ink has dried.  I have only just started using grungepaper and I have to say I love it and will be experimenting further in the coming days and weeks!  You can just see a grungepaper rose I created placed next to the card in the first picture.  The lacy strip around the base was created with a Martha Stewart border punch and a length of organza ribbon tied around on top

Thank you for joining in the QKD Hop today, I hope you are having fun!  I am now sending you on your way to Steph's blog to see the amazing creation she has to share with you today. Just before I let you go, I'd like to remind you about the awesome sale in the QKD Store. There is 20% off everything in the store, even clearance items (making these an amazing 75% cheaper) Now is a great time to add to your stash at reduced prices, but the sale ends on 31 January, so don't wait too long!

I hope you'll join in again with next Monday's Hop and don't forget, the rest of the DT have their fabulous creations to show you during the Tuesday Hop which starts on the QKD Blog tomorrow.

It's great to get feedback, I'd be so happy if you left me a comment before you continue hopping along today!

hugs
wynneth
x

Thank You Too!


Today I'm sharing with you my second 'Thank You' card made using one of my stash of  'precious' hAnglar and stAnglar stamped images. 

This is again a tiny 4x4 card and I used another of the papers from the Papermania 'Spring Life' pad.  These pretty papers really need very little extra added as they just compliment the stamped image so well.  The layout is based on the Friday Sketchers #85 sketch.

The 'Thanks' sentiment is from the set by The Greetings Farm, which is cut out with a circular punch.  The image was coloured with ProMarkers and both this and the sentiment were added using silicone glue to lift them up from the background a little. 

I added a little Spica clear glitter pen to the wings on the figure and flowers on the DP, which you can just about see in the picture.

Thank you for visiting my blog today, I'll have more creations to share with you tomorrow, so do stop by again.

hugs
wynneth
x

Saturday, 16 January 2010

Simply Saying Thank You


I've had this adorable hAnglar & stAnglar stamped image in my stash for some time, thanks to a lovely crafting pal.  I am a bit of a hoarder and do tend to hang on to stamped images I really like, rather than use them up!!

It is always a good idea to keep a few simple 'Thank You' cards in stock, for those times when a handmade card is just the ticket to show your appreciation for a gift or a little help from a friend, colleague, neighbour or family member. 

I used sketch #85 from Friday Sketcher's  for the layout, although I haven't added all the layers shown on the sketch as this sweet and sunny DP from the Papermania 'Spring Life' pad has lots going on.  Also, this is a tiny 4x4 card and would be a little crowded to add more layers I feel. 

The image was coloured using ProMarkers with touches of Spica glitter pen in black on the spots on the jacket and gold on the key plate of the lock.  The sentiment is from a set by The Greetings Farm, which I bought recently from Quixotic Paperie, stamped and cut out with a circular punch.  Finally, I added some faux stitching around the edges with a Sakura pen - which is brown in daylight but appears white/silver on the photograph - and the tiny flowers from my stash.

Thank you so much for visiting my blog today, I hope you will come back tomorrow, when I'll have another creation to share with you.  I love getting feedback on my work and would be so happy if you left me a comment.
hugs
wynneth
x

Friday, 15 January 2010

Get Well Sybil


My elderly neighbour is unfortunately in hospital following a fall downstairs just after Christmas.  The fall resulted in her breaking her arm in two places and sustaining various other injuries.  I wanted to make a special Get Well Card for her and thought these sweet and sunny papers from the Papermania Spring Time 8x8 paper pack (which I picked up recently for just £1) would bring a little sunshine to her hospital ward. 

I apologise, but I don't know the make of the stamp as I had this stamped image in my stash, sent to me by one of my lovely crafting pals (thanks to Juniejo and Annie, I now know it is a Lili of the Valley stamp - thanks girls!).  I thought he was a happy little chappie and with his huge bouquet, I hope he will bring a smile to Sybil's face when she opens the envelope.  Many hospital wards don't allow patients to have flowers now, so this everlasting bouquet is just the ticket!
I coloured the image with ProMarkers and added a few touches of Spica glitter pen.  I cut out the image and green layer using oval and petite scallop oval nestabilities dies.  I then added a length of yellow lace from my stash, securing it with staples to the bottom of the DP layer.  Finally, I added a yellow Prima flower, colouring the edges of the petals with the Gold PM to darken the colour a little to match the DP and adding a pretty flower printed brad in the centre.  A "Get Well Soon" sentiment stamped inside the card was the finishing touch before I sent the card off to the hospital, I do hope she likes it.

Thanks for stopping by today, I'd love to welcome you back again tomorrow, when I will have more creations to share with you.  Feedback is always great to receive, leave me a comment if you wish, it makes me so happy to read them all.
hugs
wynneth
x

Thursday, 14 January 2010

Wistful Mermaid


Some time ago I was dabbling with creating backgrounds using Glimmer Mists and other medium.  I made quite a few and, as is the way with this technique, all of them were different.  I stored them away in my stash, planning to use them at a later date.  Well, 'a later date' is here and when I decided to use this amazing mermaid stamp from Faerie Song Art Stamps, the handmade backgrounds were perfect.

For today's card, I used the sketch for the current challenge over on the Paper Craft Planet FSAS group.  This stamp was the one I selected as my prize when I won the November challenge.  To enter the challenge it isn't necessary to use a FSAS stamp if you don't have any already, entering the challenge is a great chance to win a stamp to start your collection!

The image layer was cut with a nestabilities die and matted on to a piece of the handmade background card, cut out with a slightly larger die from the same set.  The shells were also cut from a scrap of the same card using a Quickkutz sqeeze die, with a pearl added to each shell.  The dark blue layer was embossed in a Cuttlebug folder.  I dragged a dark blue chalk ink pad around the edges of all layers then added further distressing using a gold Krylon pen.  Finally I added some clear gems which, in reality, look like droplets of water, but appear more like pearls in the picture.

Thanks for dropping by today, it would be great if you left me some feedback, I love reading comments.  Hope to welcome you back again soon!
hugs
wynneth
x

Tuesday, 12 January 2010

Royal Kat Wednesday

I can't believe it is wednesday again already, where did that last week go?  January is certainly speeding along at a fast pace!

Once again I have a card to show to you over on the Whimsical Ink Sorority Blog which is where I and my WIS Sisters work with the delightful Mermaid stamps designed by the very talented Maigan Lynn, creating projects to share with you

My card for today showcases the newly-released Hearts on my Sleeves stamp from Queen Kat Designs which is available in the QKD Store.  I hope you'll drop over to the WIS blog to check my project out, together with the other inspirational work by the DT which you'll find on the blog. 

Thanks for stopping by today, I do appreciate your support and hope you'll return and allow me to share my work with you again soon.

I love reading feedback comments, so would be so happy if you left one here and/or on the WIS blog.

hugs
wynneth
x

Stop Press!!!

Just heard that Queen Kat Designs have an awesome 'Tuesday Twenty Sale' running in the Store from today til 31 January 2010 - that means it's gonna be Tuesday for the rest of the  month!!!!  Get an amazing 20% off everything in the store (that makes clearance items are discounted by 75% ) including 20% off the new stamps released this week!  This has just got to be the best time ever to add to your stash!!  Just enter the code TT20 at the checkout (you can also pay through Paypal) and the discount will be applied automatically.  Well, what are you waiting for? !!
hugs
wynneth
x

Duda Snowman and Friend

The challenge this week over on Craftbubble's Let's Get Stamping group is to use the weekly sketch with the added twist of using 'icy colours;.  I decided to use this sweet image from Sugar Nellie, designed by Diane Duda for my entry.  The stamp was one of the set I won in the SN 'Twelve Days of Christmas' giveaway last year.  I was so thrilled to have won, but haven't had the chance to ink up any of the stamps til now.  As the twist for this week is icy colours, I thought I'd take the opportunity to get my first card made for Christmas 2010. 

The image was coloured with ProMarkers and I added Glossy Accents to the eyes and a little clear Spica glitter pen on various parts of the image.  I then cut the image out using a nestabilities 'pinked' circle die, layering this up on to a piece of dark green pearlised card cut out with a slightly larger die from the same set.  The sentiment is from an Art House set of Christmas sentiments and cut out with a smaller pinked circle die.

I printed out the background papers from an Elusive Image CD on to white pearlised paper.  The dark green layer on the left is the same pearlised card as used on the image background layer, then embossed with a snow storm Cuttlebug embossing folder.  Finally, I added three bits of Card Candy in white pearl to the bottom of the green mat and three clear gems to the sentiment layer.

This was a fun card to make and, for the first time, this year I have actually acted on my New Year Resolution and started my Christmas card production early!!!!  My plan is to make at least two cards each week so as to avoid the last minute panic next november!

I hope you enjoyed your visit to my blog today, tomorrow I have another creation for you and hope you will visit again. 

hugs
wynneth
x

Sunday, 10 January 2010

QKD Monday Hop

Welcome to the Monday Blog Hop, you should have arrived here via Penny's blog but if you came directly here to check my blog today, I would suggest you might like to go to the QKD blog and start from the beginning of the Hop.  You wouldn't want to miss any of the awesome creations from the rest of the DT after all would you?

Sooo... today I am showcasing for you the second new release stamp from the Queen Kat Designs Fantasy series of stamps - 'Hearts on my Sleeves'.  This is available to buy right now in the QKD store.

This gogeous new mermaid would be so great to use on a Valentines card, as I am sure that most of us are already thinking we need to get cards made in time for this love-filled day!

The DT are all working with a sketch again this week and, although I moved some of the elements around a little, it is reasonably close to the sketch layout.  I coloured her with ProMarkers and Copics and added touches of my favourite glitter pens by Spica.  I stamped the image a second time on to shrink paper and coloured again with PM's and Copics and added Spica pen to this too.  Once shrunk, the colours are so much richer and darker.  The background papers are from my stash and I just love these lush limes and peach shades on the patterned squares.  I had these red crystal heart gems in my stash and they are just the perfect finishing touch to use with this image.

Thanks so much for joining in with the Hop today, I hope you've had fun and picked up useful hints, tips and inspiration along the way.  Now I'm sending you off to see what the lovely Steph has created for you.  If you lose your way during the hop, just head back to the QKD blog where there is a list of all the links so you can pick up where you left off!

Don't forget that the amazing "make your own sale" sale is still running in the QKD store where there is 10% of absolutely everything in the store!  Far too good a deal to miss out on and a great opportunity to stock up with all your essentials and get a hold of the stamps you have been wanting to buy and the extra 10% also applies to the reduced items! making it up to 65% off these items.

I hope to see you again next Monday when we have another QKD blog hop, but until then have a really creative crafty time :o)   

Don't forget that the weekly Tuesday Blog Hop will be running tomorrow, it starts at the QKD Blog and you will have the opportunity to see the creations from the rest of the DT using the newly released stamps they are working with during this Tuesday Hop.

I love to receive feedback on my work and would be so excited if you left me a comment on my creation today.
hugs
wynneth
x

Friday, 8 January 2010

Vintage Baby

I am sharing with you today another of my entries for this week's Let's Get Stamping challenge over on Craftbubble.  This is the second newly released Sugar Nellie stamp I bought just before Christmas.  This one is called Vintage Baby and I love this image. 

I coloured it with ProMarkers and Copics and added clear Spica glitter pen to the cloud to make it sparkle.  The background papers are from my stash.

I did change the sketch around somewhat for this card, but all the main elements of the sketch are included.   The sentiment, as on yesterday's card, was in my stamp stash and I don't know the manufacturer unfortunately. 

Thanks for visiting today, I appreciate your support and hope you'll stop by again soon.
hugs
wynneth
x

Thursday, 7 January 2010

Bubbles

Just before Christmas, I bought a couple of newly released stamps from Sugar Nellie.  This one is called 'Bubbles' and I think she is just so adorable - couldn't you just scoop her up and cuddle her?

This card is my second entry for the Let's Get Stamping weekly sketchie challenge over on Craftbubble.  I posted my first one on here on tuesday, scroll down if you missed it and want to take a peek!

I coloured the delightful Bubbles with ProMarkers and Copics and added a little clear Spica glitter pen to parts of the image, including the bubbles and the bottle of bubble mix.  I then applied Glossy Accents to the bubbles to give them added shine.  The papers are from Papermania and the lacy borders were cut using a Martha Stewart border punch.  Two pieces of pink Card Candy complete the sketch elements and the sentiment is a stamp I've had for a very long time and, unfortunately, I don't know who the manufacturer is. 

I'll be showing you a card made with another of the new SN stamps tomorrow, do pop back again to see the other sweet stamp I bought!

hugs
wynneth
x

Wednesday, 6 January 2010

Whimsical Ink Sorority Blog

Today is the official release day for two wonderful new stamps from Queen Kat Designs.  This week I am showcasing the first of them "Awaiting The Moment".  She is a real beauty and yet another amazing design by the very talented Maigan Lynn.  I have created a card using this lovely stamp and you can view it here on the WIS blog.  There are more great creations from the DT in the QKD Gallery, why not take a look, you're sure to be inspired by the wonderful work on there !  If you missed monday's QKD blog hop, it's not too late to do it now.  The DT have created some amazing projects for you, start here if you'd like to hop now.

Tuesday, 5 January 2010

Let's Hear it for the Boys!


I had to get my creative 'thinking cap' on this week for the weekly Let's Get Stamping challenge over on Craftbubble.  There is a simple sketch to follow, but the twist for the challenge is "don't get your knickers in a twist" !  At first I had no idea how I was going to approach this theme, but then I remembered the boxer shorts stamp that came free with Craft Stamper Magazine many months ago - perfect!

I stamped the image onto three different pieces of patterned paper and cut them out.  The background papers are from my stash and I added a couple of pieces of Card Candy and two clear gems to complete the sketch.  The sentiment was in my box of bits which I think was stamped up when my pal Annie came round a few weeks ago and brought her stash of sentiment stamps with her for me to play with. 

It isn't easy to move out of one's 'comfort zone' but I think it can be a refreshing change to have to approach a subject from a completely different angle. 

I hope today's card brought a smile to your lips and look forward to welcoming you back very soon.

hugs
wynneth
x

Monday, 4 January 2010

First Royal Kat Monday Blog Hop of 2010

Well, here we are in a brand new year and I wonder what 2010 will bring to us all.  It is always an exciting time at the start of a brand new year, with all the hopes and wishes for the next twelve months awaiting us.  This is a time for reflection on what has passed and for laying down plans for the directions we want our lives to travel in the future.

I hope you are enjoying today's Queen Kat Designs Royal Kat Monday Blog Hop and you should have arrived here from Penny's blog, if you just happened by here as your first stop, you will probably want to start the Hop at the beginning on the QKD blog so that you don't miss any of the awesome creations from the rest of the DT.


Today I'm revealing to you a wonderful new stamp from Queen Kat Designs - "Awaiting The Moment".  This latest released stamp designed by the very talented Maigan Lynn is a lovely image and will be available to order from the QKD Store from Wednesday 6 January, so don't miss out on your chance to have these lovely stamps in your collection.  I will be showcasing this delightful stamp again on wednesday on the Whimsical Ink Sorority blog, please do drop by there to see my latest project on the 6th January.

I had such a wonderful time colouring her with my ProMarkers and my layout is from a sketch that the DT were given to work with for this week.  I so enjoyed our spotlighting theme last week that I decided to do a variation of this technique on my card for the Hop today.  I decided to colour only  the two main characters in the image to make them 'pop' against the background.  This image is celebrating 'the feminine', with two very special events awaited by the central characters!  I used part of the stamp on the plain aqua layer, using the flowers to tie in with the main image rather than adding a sentiment.  The lacy layer was cut using a Martha Stewart border punch.  There are touches of clear Spica glitter pen and Glossy Accents on parts of the image to add a little sparkle. 

Thank you for taking part in the Hop today, hope you are having fun!  I am now sending you on your way to see the fabulous creation that Steph has for you today.  Hope you will join us all again next Monday when we will be revealing yet another stunning new stamp designed by Maigan.

I love to read your comments so if you'd care to leave me one today, I would be so thrilled ! 

But wait..... before I let you go, I just have to tell you about the amazing special offer at the QKD Store right now, what a great opportunity to get hold of all the amazing stamps and kits available in the store, with 10% off every single thing!  We are calling it the "Make Your Own Sale" sale - this really is too good to miss as there is a discount on even already discounted items in the Clearance section - how good is that !  Here are the details:

Take 10% off everything!  That makes all clearance items 65% off  (Good today through 01/10/10) use coupon code: BL10 when checking out your cart.

hugs
wynneth
x

Friday, 1 January 2010

Happy New Year to You All

Wishing you all a Happy New Year and a big Thank You for visiting my blog today on the first day of 2010!


I am so in love with these Mouserkins stamps from Faerie Song Art Stamps that I just had to make another card using her!  I'm hoping to acquire a few more of these delightful stamps very soon!

For this card I decided to use some 'ice-cream' fresh colours, both in the background papers and the ProMarkers I used to colour her. 

The layout is based on my very own sketch for the Let's Get Stamping challenge over on Craftbubble.com as I was the Guest Designer with their Design Team this week.  My 'reign' ends tomorrow, so I felt I should make one final entry to go out with a 'bang' !! 

The Papers I used for this card are from a 6x6 pad by Papermania, such pretty colours and designs, I know I'll be using more of them in the near future.  I added clear Spica glitter pen all over her wings to give them a magical twinkle and cut out the dotty layer with a petite scallop round nestabilities die.  I punched the left and right sides of the stripey background layer with my EK Success border punch which I call my 'cheese' punch as I think it looks like that holey Emental? cheese!!  Not to waste a thing, I used the largest of the punched out dots from the border punching on the background to place around my Mouserkin image.

Thanks for visiting, I do hope you'll stop by again real soon :o)

hugs
wynneth
x